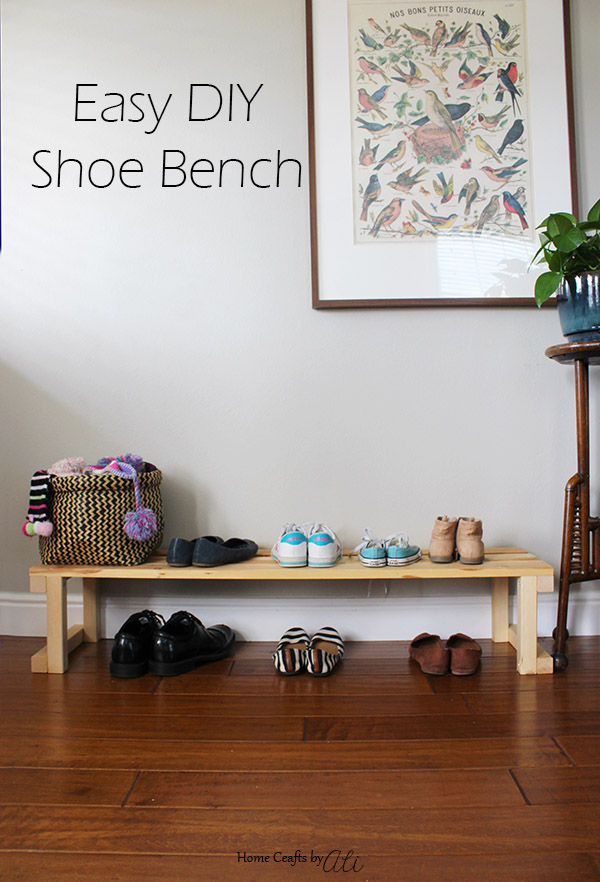
How do you organize shoes at your house? Are they in a pile next to the back door? Or in bins? Maybe your shoes are like mine used to be.....scattered in closets, one under the table and one by the door, or both hiding. Easily keep track of and organize your shoes with this DIY shoe bench.
We spent a total of $10 to make this easy bench. Yes, only $10! It was a quick project that my husband designed so we would stop tripping over runaway shoes around the house. It took him about 30 minutes to put together. Quick, cheap, and cute! What a great project.
Follow this step-by-step tutorial to learn to make an easy shoe bench for your home.
This post contains affiliate links. I will receive a small portion of any sale (at no extra cost to you) in exchange for advertising these products.
Easy DIY Shoe Bench
This shoe organizer fits perfectly along the wall next to our back door. We take our shoes off when we come in the door and they are easy to find. If you have a larger space, you can make your bench longer and put an additional support in the center underneath. We chose not to stain the wood of our shoe bench, but that is an option for yours.
Note that this bench is not for sitting on to remove your shoes. There is not enough support in the middle of the bench for that. If you want to be able to sit on the bench while you take your shoes off, you will need to make an additional base (so three total) and add it to the middle of the bench. That would be easy enough to do, just add another 2x2 piece of wood to your supply list.
Note that this bench is not for sitting on to remove your shoes. There is not enough support in the middle of the bench for that. If you want to be able to sit on the bench while you take your shoes off, you will need to make an additional base (so three total) and add it to the middle of the bench. That would be easy enough to do, just add another 2x2 piece of wood to your supply list.
Supplies Needed to Make Your Shoe Bench
1" x 4" wood board (8ft long) - 2 pieces
2" x 2" wood piece (8ft long)
Drill - with multi bit attachments
Miter Saw
Cabinet Screws
Rafter Square
Measuring Tape
Sandpaper
Stain (optional)
Note: When you buy the 1x4 piece of wood, it is actually .75x 3.75. Same for all wood boards - it's about .25 inch less than the specified size. That will make a difference for when you plan out your wood projects and want a specific depth.
1. Cut each piece of wood for your project. If the pieces are rough, lightly sand before assembling the bench.
2. Lay out 2 of the 12 inch 2x2's and 2 of the 9 inch 2x2's as shown in the photo above. Use the rafter square to easily line up your wood pieces in a perfect square.
3. Using a drill bit slightly smaller than your screws, drill a hole 1/2 inch away from each corner - ending up with 4 total holes. You will drill down through the 9" piece into the 12" piece.
4. Put a screwdriver attachment onto your drill and screw the cabinet screws into the pre-drilled holes.
5. Repeat steps 2-4 to make the second side base.
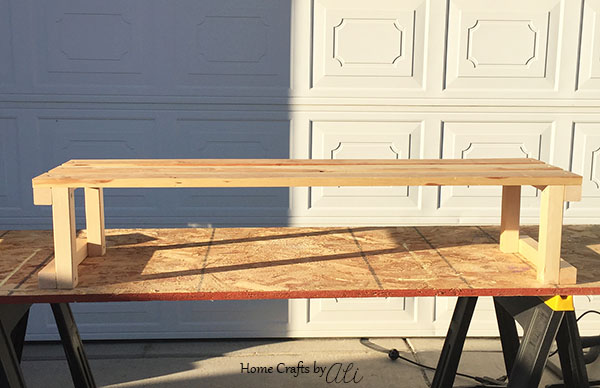
6. On a flat surface, place the two bases that you made, about 40 inches apart. The 9" pieces will be toward the inside (as seen in photo above) positioned so the bench will be 9" high before the 2x4's are put on top.
7. Place the 2x4's on top of the wood base pieces. There will be 3 of the 2x4's along the top, with small spaces between the boards.
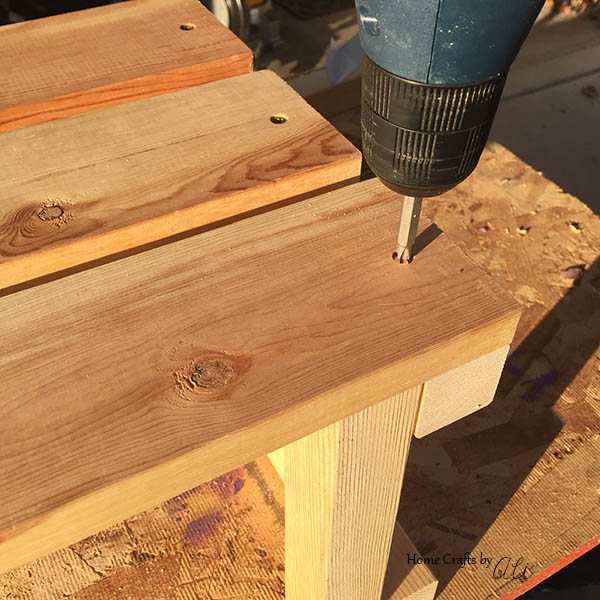
8. Change to a drill bit and pre-drill holes on each end of the 3 pieces of 2x4 (6 drilled holes total).
9. Screw the cabinet screws into the pre-drilled holes (as shown above).
You are done!
Your bench is ready to be used to organize the shoes in your home. Keep pairs of shoes neat and tidy!2" x 2" wood piece (8ft long)
Drill - with multi bit attachments
Miter Saw
Cabinet Screws
Rafter Square
Measuring Tape
Sandpaper
Stain (optional)
Note: When you buy the 1x4 piece of wood, it is actually .75x 3.75. Same for all wood boards - it's about .25 inch less than the specified size. That will make a difference for when you plan out your wood projects and want a specific depth.
How To Build An Easy Shoe Organizer
The dimensions for this shoe organizer bench are - 48" long x 9.75" high x 12" deep. To make the organizer for your space, you will have to measure the area where you will put your bench. You can vary the length of the bench to fit your needs.
Cut List
- 3 - 48" long 1x4
- 4 - 12" long 2x2
- 4 - 9" long 2x2
2. Lay out 2 of the 12 inch 2x2's and 2 of the 9 inch 2x2's as shown in the photo above. Use the rafter square to easily line up your wood pieces in a perfect square.
3. Using a drill bit slightly smaller than your screws, drill a hole 1/2 inch away from each corner - ending up with 4 total holes. You will drill down through the 9" piece into the 12" piece.
4. Put a screwdriver attachment onto your drill and screw the cabinet screws into the pre-drilled holes.
5. Repeat steps 2-4 to make the second side base.
6. On a flat surface, place the two bases that you made, about 40 inches apart. The 9" pieces will be toward the inside (as seen in photo above) positioned so the bench will be 9" high before the 2x4's are put on top.
7. Place the 2x4's on top of the wood base pieces. There will be 3 of the 2x4's along the top, with small spaces between the boards.
8. Change to a drill bit and pre-drill holes on each end of the 3 pieces of 2x4 (6 drilled holes total).
9. Screw the cabinet screws into the pre-drilled holes (as shown above).
You are done!
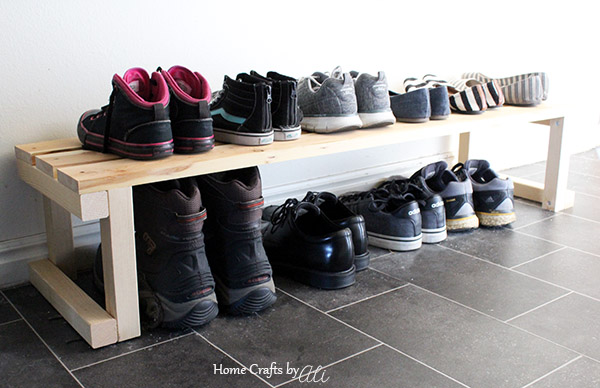
Shoes of all sizes are able to fit under and on your bench. Even snow boots fit underneath!
I was glad to join with my fellow crafters in our Creative Craft Bloggers Group for this months fun #CCBG craft challenge! This month our theme for creating a new project was using wood.

Visit these wonderfully creative projects using wood!
Home Crafts by Ali - Easy DIY Shoe Bench
2 Dishing Divas - DIY Wood Decor Tray
Try It - Like It - Create It - Welcome Sign


Found you at the Ultimate pintrest party - Gotta make this!!
ReplyDelete