Two years ago when I started blogging, I bought my DSLR camera and decided to really focus on photography - both on my blog and in my daily life. I have learned so much over the past two years and I thought I would share tips that will help those of you that are beginning photographers.
When you begin your creative journey with photography, it can be overwhelming trying to narrow down what to work on first. The tips I'm sharing today will give you a great start towards being able to confidently take better photos.
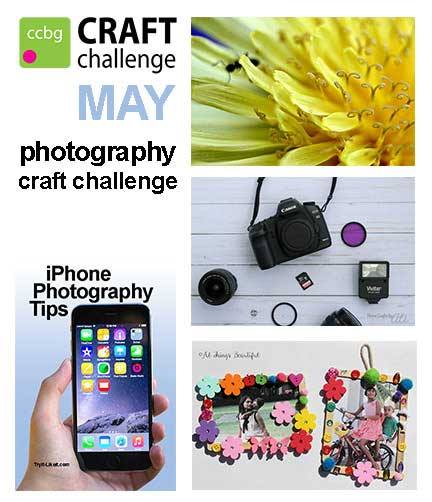
Every month, a small group of my blogging friends get together for a challenge. This month the topic was photography, so I decided to join with them. Make sure to check the end of this page for links to the other great posts.
This post includes affiliate links - I will receive a small portion of any sale in exchange for advertising these products
Photography Tips for Beginners
So, you have a camera and are ready to use it. You may be taking photos of family activities, or vacation pics that capture wonderful memories, maybe you want to chart the everyday moments that happen, you may have moved to a beautiful area and want to showcase nature in its fullest, or possibly your family is growing and you want to hold on to those special happenings.What do you do now? How can you make sure that your photos are ones that you want to keep, cherish for years, use in your scrapbooks so you don't forget? The tips I share today will help you start to get the kinds of photos that you desire.
Practice, Practice, Practice
The more photos you take, the better photographer you will become. As you try out different settings, use your camera at different times during the day, as you change the angle of your photos, and take hundreds and thousands of photos you will improve your skills and your photographs will come out better. You will be more comfortable with your camera and will become confident in knowing what setting you need to use to get the photo to look just how you imagine it in your head.
I recently updated the photos for my fruit salad post that I originally published in April of 2015. The left photo above is my original photo and back then I thought it was a good one of my fruit - the different colors and the subject of my photo placed near a lighted window (as you can tell from the horrible glare on the bowl). Now I know more about what makes a photo interesting to someone. The photo on the right I took 2 weeks ago - a colorful background, a nice display of my salad in an interesting glass dish, the photo was taken in a nicely lighted area with no glare, and photo staging with scattered colorful fruit. It's amazing the difference a few years and a few thousand photos taken will make!
I recently updated the photos for my fruit salad post that I originally published in April of 2015. The left photo above is my original photo and back then I thought it was a good one of my fruit - the different colors and the subject of my photo placed near a lighted window (as you can tell from the horrible glare on the bowl). Now I know more about what makes a photo interesting to someone. The photo on the right I took 2 weeks ago - a colorful background, a nice display of my salad in an interesting glass dish, the photo was taken in a nicely lighted area with no glare, and photo staging with scattered colorful fruit. It's amazing the difference a few years and a few thousand photos taken will make!
Lighting Matters
- Indoor lighting is sometimes unavoidable and you have to deal with overhead lights that cast a blue or yellow tinge. Since these are not from natural light, your camera has a harder time getting the white tones of the photo correct. You can change the white balance on your camera and change the ISO, but it will not be perfect.
- Natural light is best for photos. Whether you are taking product photos, family photos, event photos, or of course nature photos. The light varies throughout the day, so you have to plan when to take your photos at the optimal time. If you are photographing products or food, you want clean (more blue) light of late morning or mid-day. Landscapes and nature look best in the early hours of the day or late afternoon/evening. You will get a stark glare during the middle of the day. If you are taking family photos and event photos (weddings, outdoor birthday parties) you want to have soft, golden light.
- The "Golden Hour" or "Magic Hour" of photography happens in the hour after sunrise and the hour before sunset. Really, the golden tone of your photos will be amazing and more pleasing than you can imagine.
I took this photo on an Idaho farm at sunset. The golden light is soft and makes everything look appealing.
Learn How To Use Your Camera
Whether you are using the camera on your phone, a point and shoot digital camera, or a DSLR camera you will need to know the basics of what your camera can do. Read through the owner manual or search online for information about your specific camera. When you know what features are available, you will be more effective in your photography.
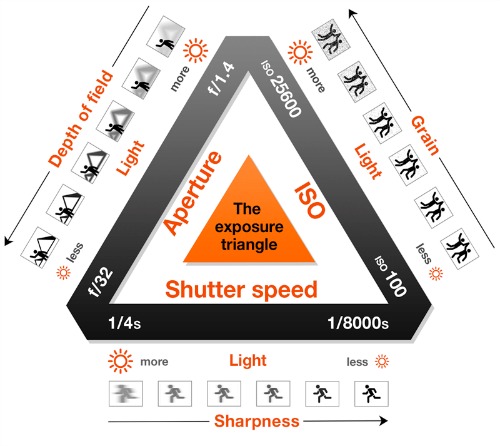
Learn About the Exposure Triangle
 |
| Image Source: PhotoTraces.com |
- Aperture - Depth of field. Larger f number = more of the whole image is in focus (good for landscape photography, large groups, having the foreground and background both in focus). Smaller f number = focus on one specific part of the image and blur the rest.
- Shutter Speed - How fast the shutter in your camera closes when taking a photograph. If your subject is moving (sports, water, car lights, everyday photos) you need to have the shutter speed change depending on what value of sharpness you want. If you want to see a split second shot clearly at a soccer game, you will want your shutter to be fast (1/500th of a second). If you are taking a photo of a waterfall and want a misty and soft image, keep your shutter open longer (1/2 a second or longer). You will have to play around with the shutter speed to see what settings will give you the outcome you are looking for.
- ISO - How much light are you letting in and how clear your photo turns out, the sensitivity level of your camera to light. In bright light and want more detail, color, and brightness in your photos, lower the ISO (usually 100). If you are in a low light situation (nighttime, indoors without a flash, sunset) you will bump up the ISO to increase the sensitivity to light because you don't have as much, but your photos will be grainy instead of clear.
Move Away From Shooting in Auto Mode
Don't understand manual mode or are scared to try? Thankfully DSLR cameras have settings to help you ease into manual while you are learning. Most cameras have "creative mode" where you pick the one setting (ISO, Aperture, or Shutter) you want to manually adjust and the camera picks the other settings to what it senses will give you the best photo.
I shoot in Aperture Priority most of the time. I get to choose what depth of field I want in my image and the camera automatically adjusts the ISO and shutter speed. If I am trying to produce a photo of a snowflake falling, I change to Shutter Priority so I can get individual snowflakes instead of a white blanket.
Lavender Stem in the Snow - Image from Ali Biorn Photography
Equipment
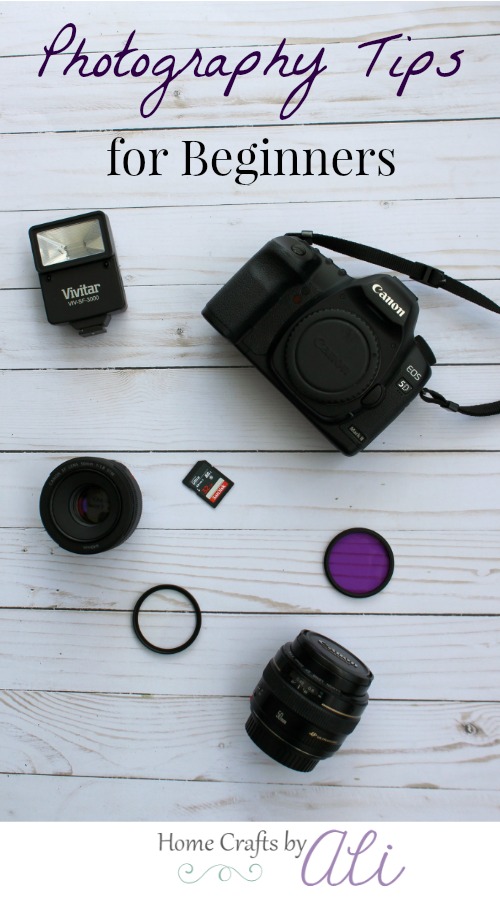
- Lens - Upgrade your lens instead of buying a new camera body. The kit lens you get with your camera is good up to a point, then you may want to buy a specialty lens. Most people upgrade to the "nifty fifty" 50mm lens first. You may want a wide-angle lens for whole room or landscape photography.
- Tripod - Buy a sturdy tripod that you can use for night photography, product or food photography, making videos, and any photos where the shutter will be open long.
- Filters - filters will help when taking photos during the middle of the day when colors are washed out.
- Lens Cloths - If you get dust or a speck of something on your lens, you want a good lens cloth to help clean it. Using your shirt can smear oils from your body or even scratch your lens.
- Editing Software - Having an editing program can help in post processing. I use Adobe Photoshop and the free online program PicMonkey. Photoshop I use for high quality photos that I use on my photography website. PicMonkey I use for many of my blog photos on this site to balance tones and brighten photos.
Candid Shots
So often you want the "perfect" photo of everyone looking at the camera, smiling until their cheeks hurt. While those are wonderful to have, you also want to make sure to take the candid, no-pose shots too. You will get the authentic personality to show through and that enhances the photo so much. Capture people laughing at a joke, looking into each others eyes, playing in the yard. Those everyday moments mean so much.
Photo Composition
Where items are located in your photo to bring the eye to your subject, staging photos with props and burst of color, framing your subject, balancing elements, symmetry and more. There is so much that goes into the composition of your photos and once you understand the elements of composition your photos will have even more impact.
Learning Resources
- Take a local photography class. Check with the nearest college, university, local school district, and even your city to see if there are any photography classes for continuing education. I recently took a 6 week photography course through my city and I learned so much from my instructor (Daniel Hopkins Photography).
- Take an online photography class. There are some free ones offered or you can find ones with nominal fees. They are generally videos to follow. I have watched a few through CreativeLive and also Craftsy.
- Buy books to help you understand terms or to go more in depth than checking a website. I advise these: Learn to See Creatively and John Shaw's Guide to Digital Nature Photography. Both books talk about composition, lighting, angles, and much more. You can read my reviews of the books here and here.
Be Patient
You will not master photography overnight. It takes time, practice, and patience. You can't become proficient in all things at one time, you learn a little bit about each different tip/element and grow from there. I guarantee that when you have been taking photographs for 6 months and you look back, you will see a marked improvement. Then six months later it will be the same and so on. When I look back at photos I took a year ago, I can't believe how far I have come in experience.
I hope these tips help you at the start of your creative journey with photography. You may come to love having that artistic outlet and decide to pursue it as a life-long hobby or even as a semi-professional. After practicing so much the past two years, I decided I wanted a website to showcase my favorite images I take so I made a brand new site, Ali Biorn Photography, to share some of my favorite photos.As I mentioned at the beginning of this post, the Creatively Craft Bloggers have written some photography posts today. Click on the links below the photo to visit their blog posts.
Try it - Like it iPhone photography tips
Life Beyond the Kitchen Macro Tubes Help You Take Really Close Shots
Home Crafts by Ali Photography Tips For Beginners
Al Things Beautiful DIY Photo Frames To Make With Kids


Great resource, Ali! I haven't seen the exposure triangle before but can see where it would be really helpful. Pinned for later reference.
ReplyDeleteGlad you found it informative Lydia. As you change the settings for one part of the triangle, there is usually a downside to the other parts. It's finding the right balance.
DeleteGreat informative post. I hadn't see the exposure triangle before either (and I used to teach photography!) always something new to learn.
ReplyDeleteThanks for stopping by Janet! I have really come to love photography and can't learn enough!
DeleteThere's so many things to consider when taking photos, I'll need lots of calm and patience to get started here. Your guide will be my light at the end of the tunnel, thank you so much for it!
ReplyDeleteThere's so many things to consider when taking photos, I'll need lots of calm and patience to get started here. Your guide will be my light at the end of the tunnel, thank you so much for it!
ReplyDeleteSo glad you found this helpful Yolanda! Hope you enjoy your journey with photography!
Delete