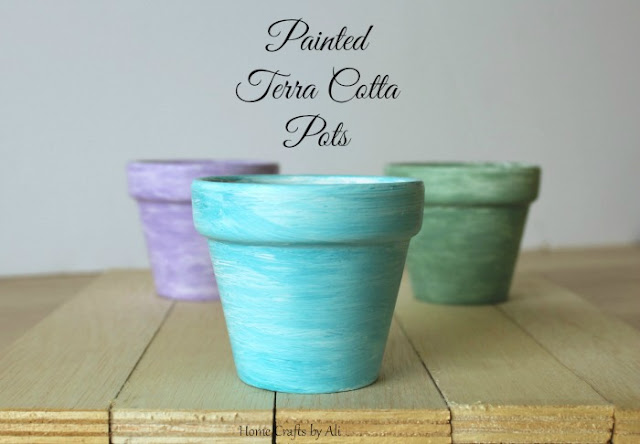
A few weeks ago I was wandering around Hobby Lobby (which truth be told, happens every 2 weeks or so because I can't stay away!) and I saw a package of small terra cotta pots (2.625 inch). There were six in the package and I thought they would be perfect for adding to my spring display, using to plant some small flowers to give to friends, or plant some succulents. I didn't want to leave them the terra cotta color though, so I decided to paint them. I had never painted pots before, so it was going to be a crafting adventure for me.
If you want to add some color to your pots go ahead and grab some paint and a brush, read my tutorial, and get crafting!
Painted Terra Cotta Pots
*** This post contains affiliate links. If you purchase an item listed, I will receive a small amount for advertising the products listed.***
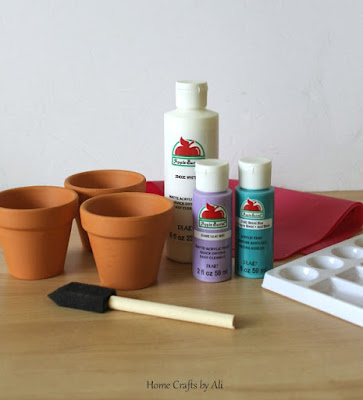
Supplies Needed to Make Easy DIY Painted Pots
Terra cotta potsSponge Brush or Foam Makeup Wedge
Paint of your choice
Paint palette
Craft mat
Mod Podge - Gloss formula
Let me tell you a bit about my supplies before we get to the instructions.
- For my paint I used Apple Barrel brand paint in 4 colors - White, Lilac Mist, Bimini Blue, and Sage Green. You can use any acrylic craft paint that you want - pick out your favorite seasonal colors and you are set.
- I use my Mod Podge Craft Mat for all of my craft painting projects to protect the surface of my desk. The silicone mat is easily washed and quite useful. You can read a full review of the mat here.
- When applying the Mod Podge, I generally use a small makeup sponge wedge instead of the handled sponge brush. I find that the makeup sponge is a better at smoothly adding the Mod Podge to my projects.
How To Paint Terra Cotta Pots
Just so you know, the paint dries quite quickly on the pots. It was a nice surprise because I didn't have to wait long for drying time between coats of paint like I usually do with my wood projects.
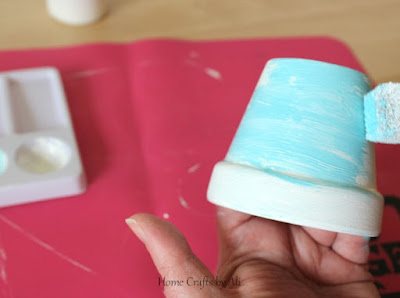
I started out by painting the pots white. I painted a layer on the outside of the pot, on the lip, and slightly around the inside at the top. I wasn't sure how I was going to use these, so I wanted to make sure that if I placed a plant in them, the part of the pot above the soil would be painted as well.
When it was time to add the second color to the pot, I didn't paint it solidly. I liked the way that a slight bit of the white paint showed through when I used the sponge to add the color to the pot. If your color goes on too solidly, add a bit more of the white paint while the colored paint is still wet to make it slightly marbled looking.
The paint on your pot will be dry in about 3 minutes, then you should add a thin layer of Mod Podge to the outside of your pot. The Mod Podge will act as a sealant so your paint will not chip or get rubbed or scratched away. In my supplies I say to use the gloss formula of Mod Podge. I plan on using mine inside for crafting purposes. If you plan to place your pots outside, I would advise you to buy the Outdoor formula of Mod Podge. That will protect your paint from water.
There you have it! All done with your painted terra cotta pots! A quick and thrifty little project for you. I made three of these pots and it took me about 20 minutes total.
Since I had never painted terra cotta pots before, it was perfect for my Try Something New Every Month project for March. I've been having a good time thinking up projects for the past few months as I've tried new crafting techniques (see here and here). You don't have to be a blogger to join up with the TSNEM group. If you are interested in learning more, you can visit this link. If you want a visual of what people are working on, visit Instagram and search the hashtag #TSNEM
Thanks for joining my tutorial in painting terra cotta pots. To see how I used these colorful pots in my Spring home decor, you can visit my Spring Decor - Colorful Painted Pots with Nests post. They will bring some color to your Spring mantle.
If you liked this project, check out more of my Paint Projects here!


Impressive creativity in the planting pots design with it. Very attractive to be with the gaining of natural wealth and also the decorative items in-front of our homes.
ReplyDeleteportal solutions in coimbatore | kovai it software solutions
Love this idea!
ReplyDeleteThanks Amy! It adds some nice color to the pots to brighten them up.
DeleteThese look *so* springy and fresh, they look great!
ReplyDeleteThank you for your nice comment Stephanie! They have made a great addition to my spring decorations.
Delete