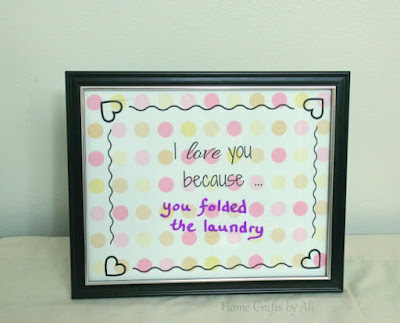
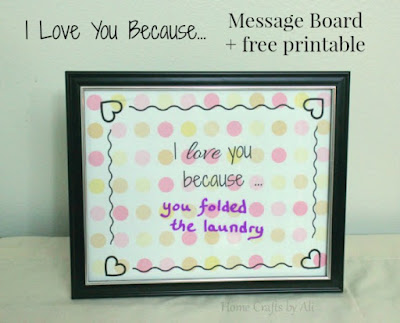
My kiddos love to leave us little notes all around the house. My craft room door has three notes on it right now with hearts and smiley faces. I thought making this message board would be a fun way for them (or us) to leave messages and we can change the message every day. It's so easy to do with dry erase or chalk markers.
I had seen this tutorial a few years ago and decided to make my own, with a little added decoration and offer you the free printable so you could print out your own to make for your home.
***This post contains a few affiliate links. If you purchase a linked item, I will receive a small amount from the sale which will help me cover blogging costs. ***
***This post contains a few affiliate links. If you purchase a linked item, I will receive a small amount from the sale which will help me cover blogging costs. ***
Supplies Needed
1 piece scrapbook paper
1 8 x 10 picture frame
ink for you printer
paper trimmer or Scissors
decorative buttons or other embellishments (optional)
If you have a Dollar Tree nearby, they generally have a selection of 4 or 5 different frames to choose from. I bought mine thinking that I could possibly use spray paint to change the color of the frame, but I ended up liking it as it was. So just remember, even if the frame color isn't what you are looking for, that is easily fixed with one or two coats of any color spray paint of your choice.
So to start, print the file I have provided onto a piece of 8 1/2 x 11 inch scrapbook paper. I used a light color background so the printed message was easy to see. You will need to trim a bit of paper from each edge, about a quarter inch on each side, depending on the opening size for your frame.
Place the paper in the frame, put the backing on, and you are done! Use your chalk markers or dry erase markers to write your message.
If you think that your frame looks too plain, dress it up a bit with some embellishments. You can use fabric flowers, washi tape, buttons, or felt shapes to decorate your frame.
Here are the two options for the "I Love You Because...." printables.
paper trimmer
decorative buttons or other embellishments (optional)
If you have a Dollar Tree nearby, they generally have a selection of 4 or 5 different frames to choose from. I bought mine thinking that I could possibly use spray paint to change the color of the frame, but I ended up liking it as it was. So just remember, even if the frame color isn't what you are looking for, that is easily fixed with one or two coats of any color spray paint of your choice.
So to start, print the file I have provided onto a piece of 8 1/2 x 11 inch scrapbook paper. I used a light color background so the printed message was easy to see. You will need to trim a bit of paper from each edge, about a quarter inch on each side, depending on the opening size for your frame.
Place the paper in the frame, put the backing on, and you are done! Use your chalk markers or dry erase markers to write your message.
If you think that your frame looks too plain, dress it up a bit with some embellishments. You can use fabric flowers, washi tape, buttons, or felt shapes to decorate your frame.
Here are the two options for the "I Love You Because...." printables.
This was a fun project to design and so easy to put together. Since I designed the printable and saved the file, all you have to do is download the PDF and print it out.
A craft group I belong to, Creative Craft Bloggers Group, decided to start a monthly challenge. This month the challenge was to create a printable. I hope you enjoy this printable and use it with your family.
Here are all of the crafts that were submitted to the challenge. Links are below the picture so you can visit each one.
Look for my next challenge project in February.


love it - thanks for being a part of the challenge
ReplyDeleteIt was fun and I'm looking forward to February's challenge.
DeleteLove this! We often say I love you, but its nice to add a sentiment to it.
ReplyDeleteMy girls have changed the message daily. Thanks for your comment! =)
Delete