This post may contain affiliate links.
September is National Sewing Month and every week I will be sharing an easy sewing project for beginners. These are fun items to make for people with experience as well. You can visit my Quick & Easy Pillowcase tutorial from last week after you read this one.
This fun sewing project will only take about 15 minutes your first time. The most time consuming part is the ironing to make sure the edges stay folded under. Once you have made a few and you are more confident with your sewing skills, it should only take about 5 minutes to make one. A great quick gift to give a new mother!
Materials Needed
Flannel
thread
ribbon (optional)
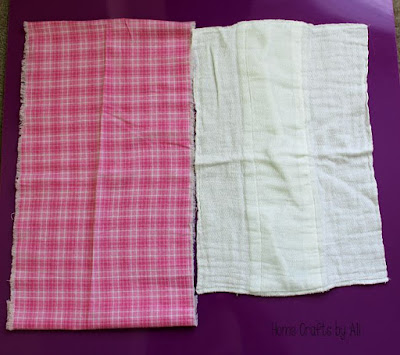
The first thing to do is iron your fabric. You will have to measure the center panel of the cloth diapers, where the fabric is a double layer. You piece of fabric will need to be 1 1/2 inch longer than the diaper and 1 1/2 inch wider than the center panel.
You will fold over the edges of the fabric on all four sides and iron them. This will make sure that you have a nice clean edge when you sew the flannel to the cloth diaper.
Pin your fabric onto the center panel of the diaper.
Sew the fabric onto the cloth diaper using a zig-zag stitch. When using a zig-zag stitch, the needle will go back and forth, so you need to make sure that you start far enough in from the edge of the flannel fabric so the needle stays on the fabric. Sew around all four edges of your flannel. Make sure when you get back to where you started to stitch over your first few stitches, then backstitch for a few stitches. This will make sure that your thread will not unravel.
This is a closer look at what the zig-zag stitches will look like.
Your new burp cloth is done! Trim the strings, make a few more, wrap them with a ribbon and deliver them to your friend.
Want another option for burp cloths? Buy some cute and soft ribbon. Cut a piece of ribbon that will measure the whole width of the cloth diaper. Pin the ribbon a few inches from the bottom of the edge of the diaper. Make sure that the two cut edges of the ribbon are tucked under. Use the zig-zag stitch to sew the ribbon to the diaper.
If you don't want to use a ribbon because of it being too scratchy, you can cut a strip of fabric and sew it on, making sure to iron the edges under so you have clean edges instead of frayed fabric.
Have any questions? Please feel free to ask in the comments.


I forgot all about making burp cloths! They would be a fun gift my daughter could make for her aunties. Thanks for reminding me! :)
ReplyDeleteGlad to remind you of this easy project. =) My daughter saw me making these and asked to help!
DeleteOh my goodness! Those are so cute! My daughter could make these for my friend ! :D
ReplyDeleteThank you! My daughter wants to make some for her teacher who is expecting in the Spring. It is a fun little project!
DeleteI didn't know September was sewing month!?!
ReplyDeleteGreat project, sure wish I knew how to do this for my older kids, when we just used a plain ugly cloth diaper. LOL
Thanks for linking up to our Welcome Home Wednesday Linky Party, be sure to come back this week!!!
Thanks for visiting Tracy. I will definitely stop by again this week.
Delete